In this chapter, we will study how to Add Pages into the WordPress. Adding pages is similar to adding posts in WordPress. Pages are static content and often do not change its displayed information.
Following are the simple steps to add pages in WordPress.
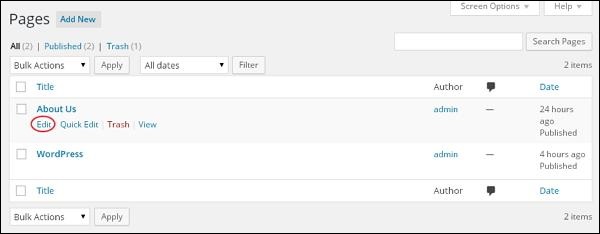
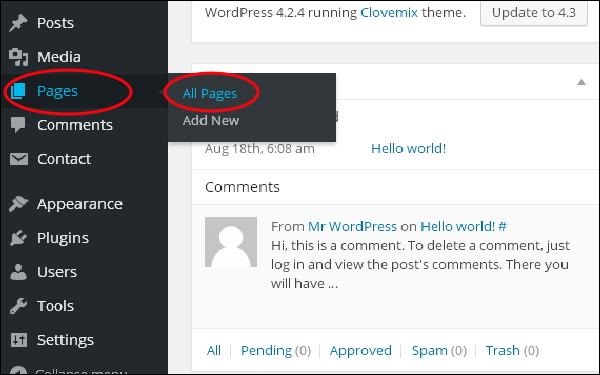
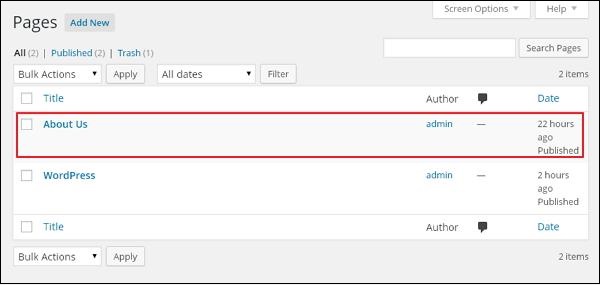
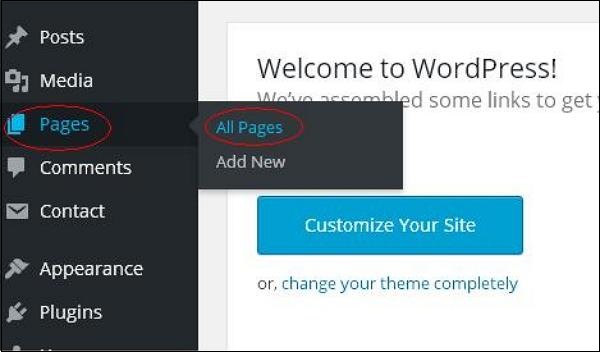
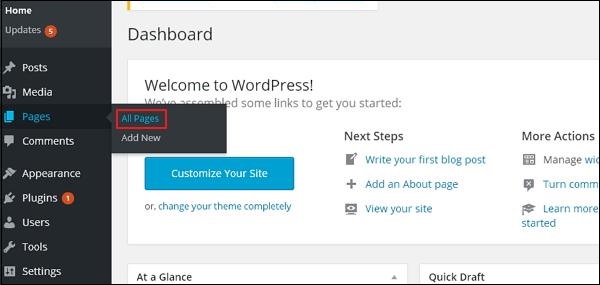
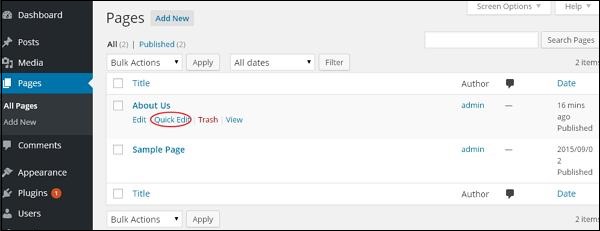
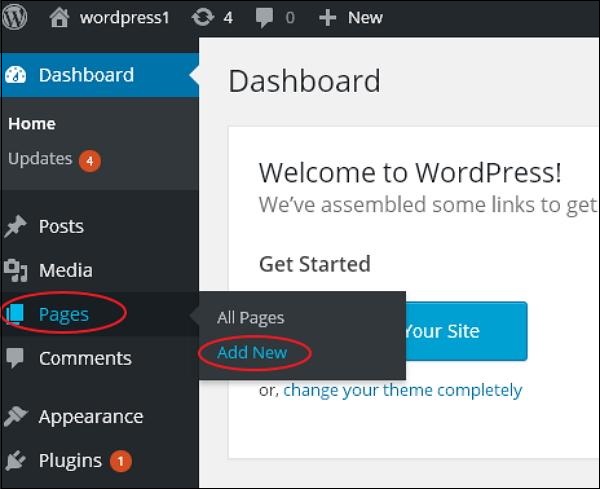
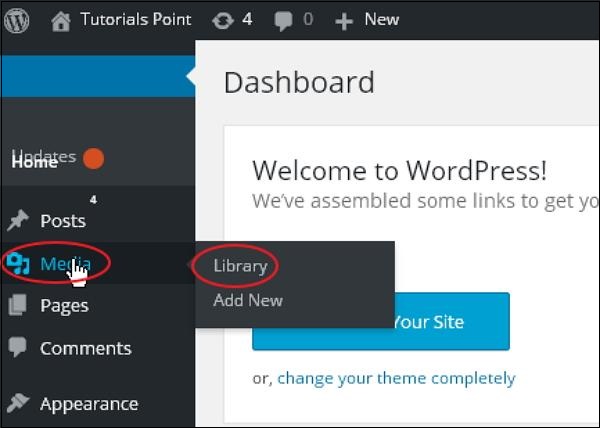
Step (1) − Click on Pages → Add New as shown in the following screenshot.

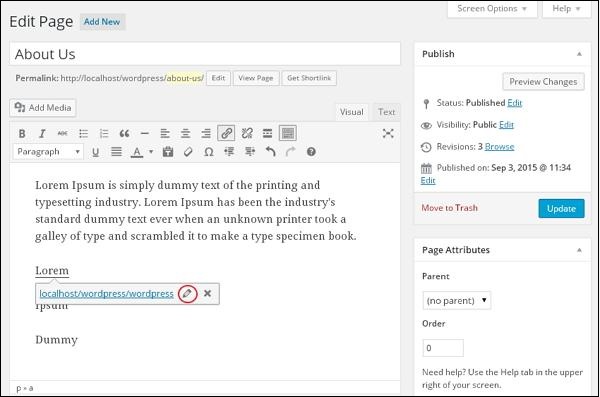
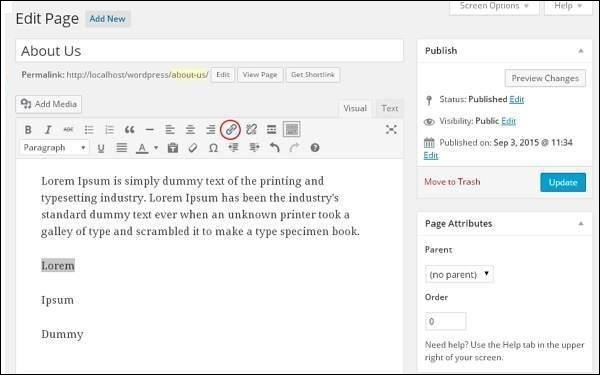
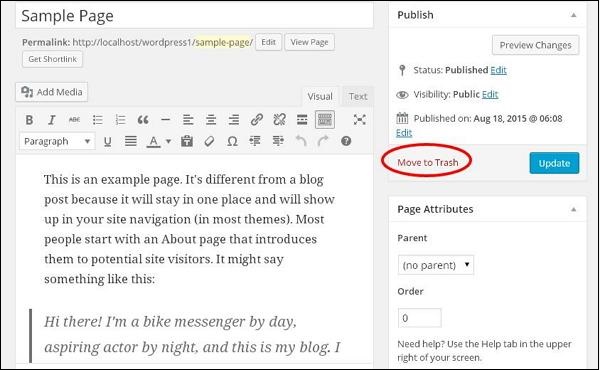
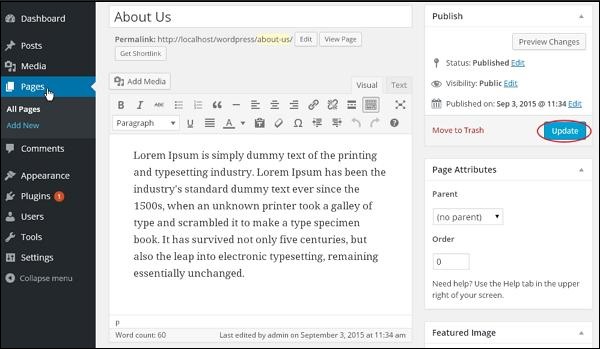
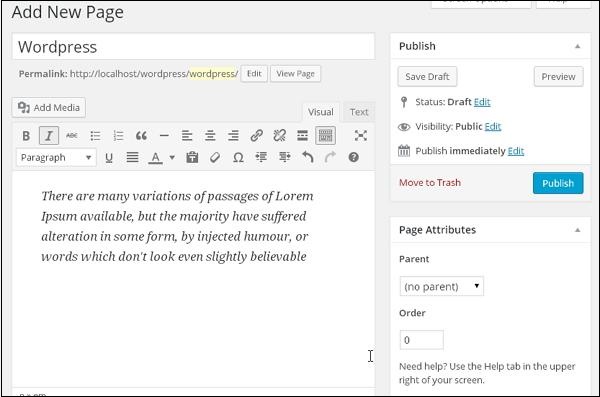
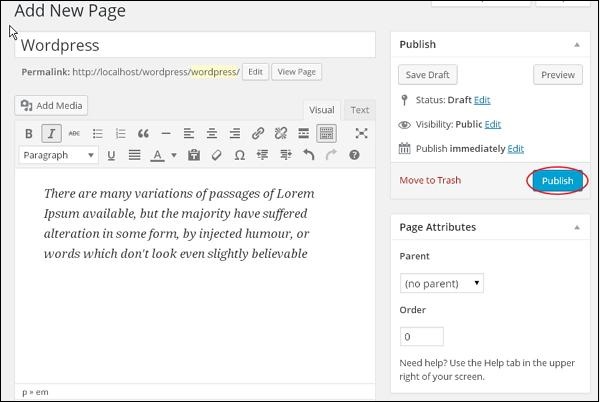
Step (2) − You will get the editor page as seen in the following screenshot. The editor page has two tabs, Visual and Text. You can insert text in either of these. Here, we’ll study about inserting text into Visual format.
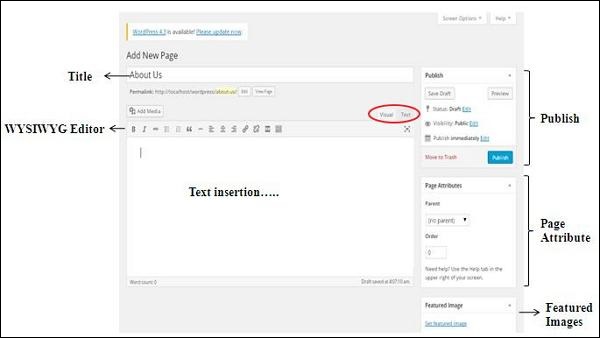
Following are the details of the fields on editor page of the Add New Page.
Title
It is used to write the title of the article, which is later displayed on the page.
Permalink shows the potential URL for the page below the title. The URL generates as per the given title.

WYSIWYG Editor
It is a WYSIWYG Editor, which is similar to a word processor interface where you can edit the contents of the article.
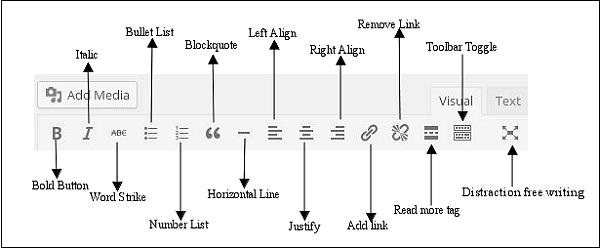
Following are the options present of WYSIWYG editor −
-
Bold Button − Used to bold your font.
-
Italic − Used to italicize the font.
-
Word Strike − Strikes through the content.
-
Bullet List − Adds bullets to content.
-
Number List − Adds numbers to the list of the content.
-
Blockquote − Quotes the text.
-
Horizontal Line − Creates a horizontal line between sentences.
-
Left Align − Sets the content on the left side of the page.
-
Right Align − Sets the content to the right side of the page.
-
Justify − Justifies the content of the page.
-
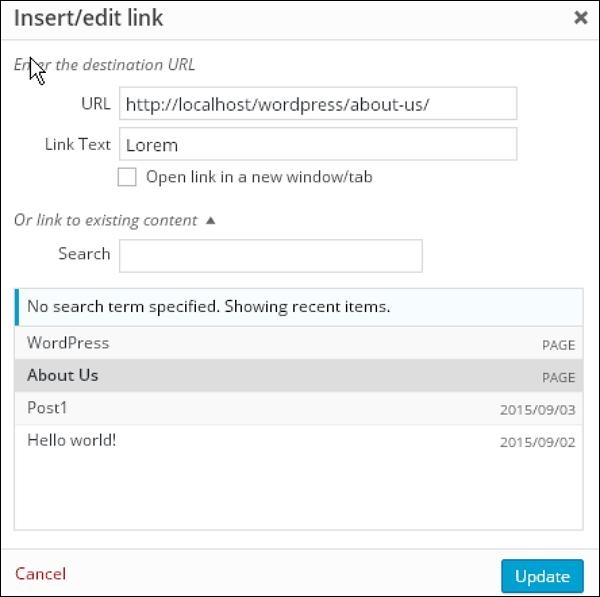
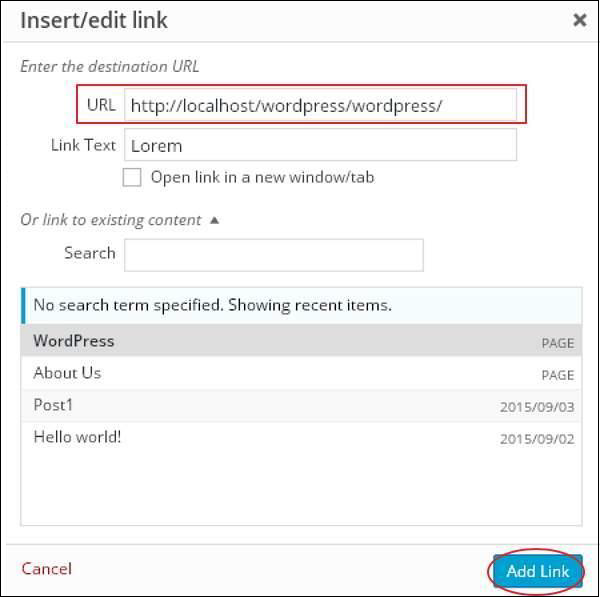
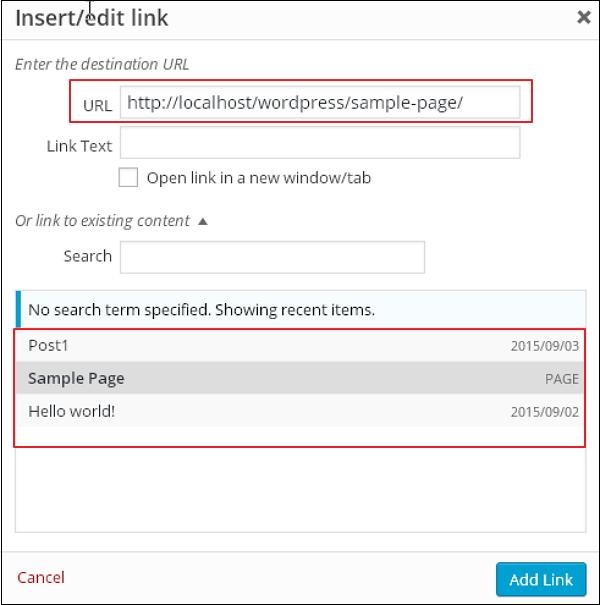
Add Link − Adds a link to your content. When you click on this button, the following page gets displayed.
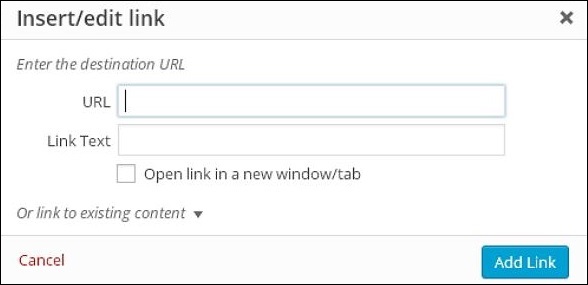
Following are the fields present in the Insert/edit link.
-
URL − Enter URL you want to link.
-
Link text − Insert text you want to enter into the link.
-
Open link in a new window/tab − Open your link page into the new tab or window. Check the box as required.
-
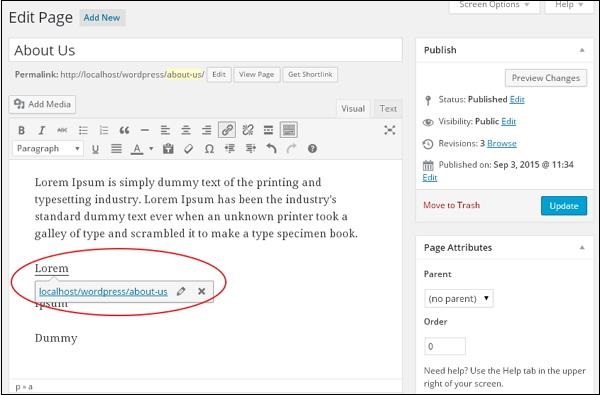
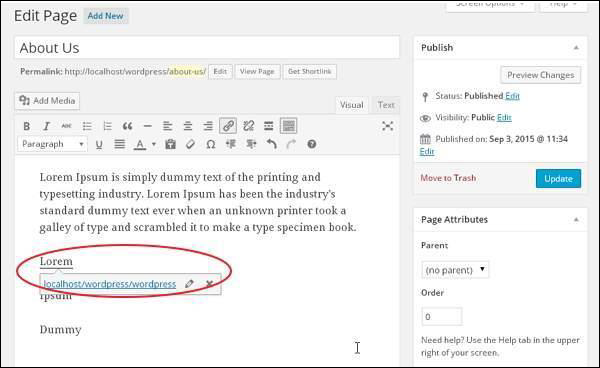
Or link to existing account − Links to an existing content page by selecting the page from the given list. When you click on existing page then you get a link created in the URL section as seen in the following screenshot.
-
Remove Link − Deletes the particular link added for text or content.
-
Read more tag − Adds Read More tag to your page.
-
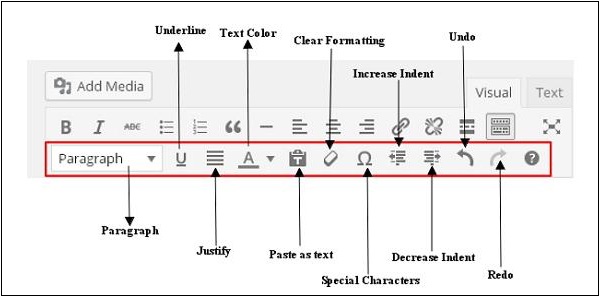
Toolbar toggle − Clicking on this you get another list of toolbar as shown in the following image.
-
Paragraph − Selects the headings as required for the text from the dropdown.
-
Underline − Underlines the sentences.
-
Justify − Justifies your content.
-
Text Color − Sets color for words or sentences.
-
Paste as Text − Pastes your text.
-
Clear Formatting − Deletes selected content.
-
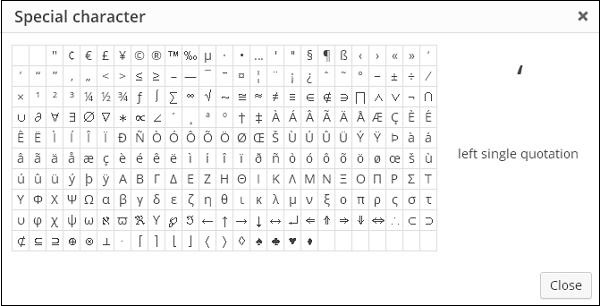
Special character − Inserts special characters needed in your content.
-
Increase Indent − Increases the indent of the page.
-
Decrease Indent − Decreases the indent of the page.
-
Undo − Reverses the most recent editing command.
-
Redo − Opposite of undo, restores the most recent editing command.
Text Insertion
For writing the content of an article.
Publish
To publish the page to the user on the website.
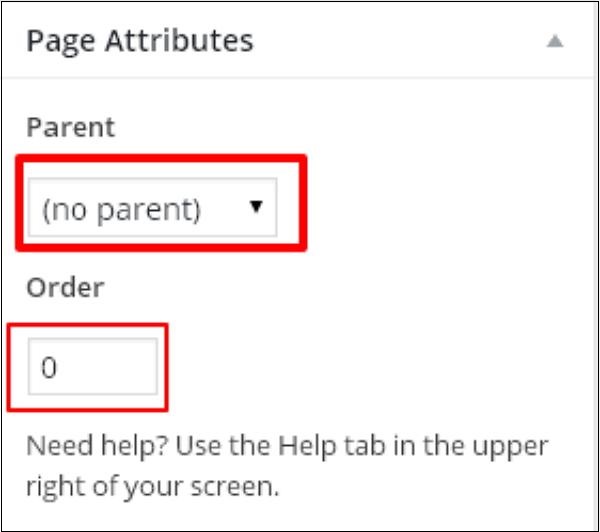
Page Attribute
Page attributes module allows you to select the parents for your particular page. You can also set order of the pages.
Featured Images
Includes the images in the pages.