wordpress publish posts

In this chapter, we will study how to Publish Posts in WordPress. Publish is used to make the post available to all the users wherein every user can view that particular post. Publishing a new post in WordPress is an easy process.
Following are the steps to Publish Posts in WordPress.
Step (1) − Click on Posts → Add New in WordPress.

WordPress Publish Posts

Step (2) − You will get the editor page of the Post as shown in the following screenshot. You can use the WordPress WYSIWYG editor to add the actual content of your post.

WordPress Publish Posts

Step (3) − Click on Publish button to publish your respective post.

WordPress Publish Posts

After clicking on publish, your posts get published for the user to view it.

wordpress preview posts

In this chapter, we will study how to Preview Posts in WordPress. Preview Post is to view the post before it is published to the user. It is safer to preview your post and verify how your post looks on the website. You can edit or change the post as per your need after previewing.
Following are the simple steps to Preview Posts in WordPress.
Step (1) − Click on Posts → All Posts in wordPress.

WordPress preview posts

Step (2) − You can view Post1 (Post1 was created in the chapter WordPress – Add Posts). When the cursor hovers on the Post, then a few options get displayed below the Post name. Click on the View option as shown in the following screenshot.

WordPress preview posts

Or else you can view your post directly while editing or adding post by clicking on the Preview button as shown in the following screen.

WordPress preview posts

Step (3) − You can view your post, when you click on View or Preview.

WordPress preview posts


                             <<<   Back to WordPress Home

wordpress delete posts

In this chapter, we will study how to Delete Posts in WordPress.
Following are the steps to Delete Posts in WordPress.
Step (1) − Click on Posts → All Post in WordPress.

WordPress delete posts

Step (2) − You can delete Post1 (Post1 was created in the chapter WordPress – Add Posts). When the cursor hovers on the Post, then a few options get displayed below Post1. Click on Trash option to delete the post.

WordPress delete posts

Step (3) − You can view your post lists to confirm if the above post is deleted.

WordPress delete posts

                                              <<<   Back to WordPress Home

wordpress edit posts

In this chapter, we will study how to Edit Posts on WordPress.
Following are the simple steps to Edit Posts in WordPress.
Step (1) − Click on Posts → All Posts in WordPress.

WordPress Edit Posts

Step (2) − You can view Post1 (Post1 was created in the chapter WordPress – Add Posts). When the cursor hovers on the Post, few options get displayed below the Post name. There are two ways to edit the Post i.e. Edit and Quick Edit.
Edit − Click on Edit option in Post1 as shown in the following screen.

WordPress Edit Posts

You can edit or change the content or title of the post as per your needs, and then click on Update button as shown in the following screen.

WordPress Edit Posts

Quick Edit − Click on Quick Edit option in Post1 as shown in the following screenshot.

WordPress Edit Posts

Here you can edit the Title, Slug and date of the posts and can also select the categories for your post as shown in the following screenshot and then click on Update button to confirm post edits.

WordPress Edit Posts


wordpress add post

In this chapter, we will study how to Add Posts in WordPress. Posts are also known as articles and sometimes referred as blogs or blog posts. These are used to popularize your blogs.
Following are the simple steps to Add Posts in WordPress.
Step (1) − Click on Posts → Add New in WordPress.

WordPress Add Posts

Step (2) − You will get the editor page of the Post as shown in the following screen. You can use the WordPress WYSIWYG editor to add the actual content of your post. We will study in detail about WYSIWYG editor in the chapter WordPress – Add Pages.

WordPress Add Posts

Following are the fields on the editor page of the Add Posts Page.
  • Post Title − Enter the title of the post, i.e., Post1.
  • Post Content − Enter the content of your post.
Step (3) − Click on Publish button to publish your respective post.

Wordpress Add Posts

Following are the few other options present in the Publish section.
  • Save Draft − It saves the post as a draft.
  • Preview − You can preview your post before publishing.
  • Move to Trash − Deletes the post.
  • Status − Change the status of your post to Published, Pending, or Reviewer Draft.
  • Visibility − Change the visibility of the post to Public, Private or Password protected.
  • Published − Change the publishded post date and time.

wordpress arrange category

In this chapter, we will study about how to Arrange Categoriesin WordPress. You can’t arrange categories directly in WordPress. Hence, you will need to install Category Order plugin to arrange the created categories in a particular way.
Step (1) − Click on Posts → Category Order in WordPress. The Category Order menu displays after adding the Category Order plugin. You can study how to install plugins in the chapter Install Plugins.

WordPress arrange category

Step (2) − In the following screen, you can see that the create categories section are not in order.

WordPress arrange category

Step (3) − Now, you can rearrange your categories by just dragging the categories as per your choice. Click on Order categories button to save the ordered categories.

WordPress arrange category
                                                 <<<   Back to WordPress Home

wordpress delete category

In this chapter, we will study about how to Delete Categories in WordPress.
Following are the simple steps to delete categories in WordPress.
Step (1) − Click on Posts → Categories in WordPress.

WordPress delete category

Step (2) − You can delete Category1 (Category1 was created in the chapter WordPress – Add Category). When the cursor hovers on the Categories, a few options get displayed below the Category name. Click on Delete button as shown in the following screen.

WordPress delete category

When you click on delete, you will get a pop message asking for confirmation to delete the particular category as shown in the following screenshot.

WordPress delete category

You can click on OK button and delete the category permanently.                             
                                       <<<   Back to WordPress Home

wordpress edit category

In this chapter, we will study the simple steps to Edit Categories in WordPress.
Following are the simple steps to edit categories in WordPress.
Step (1) − Click on Posts → Categories in WordPress.

WordPress Edit Category

Step (2) − You can view Category1 (Category1 was created in the chapter WordPress – Add Category). When the cursor hovers on the Categories, then a few options get displayed below the Category name. There are two ways to edit the categories i.e. Edit and Quick Edit
Edit − Click on Edit option in Categories section as seen in the following screenshot.

WordPress Edit Category

You can edit any of the required field, and then click Updatebutton as shown in the following screen.

WordPress Edit Category

Category fields are same from the chapter WordPress – Add Category.
Quick Edit − Click on Quick Edit option in Categories section as shown in the following screen.

WordPress Edit Category

Here, you can only edit the Name and Slug of the category as seen in the following screen and then finally click on Update Category button.

WordPress Edit Category


wordpress add category

In this chapter, we will study about how to Add Categories in WordPress. Category is used to indicate sections of your site and group related posts. It sorts the group content into different sections. It is a very convenient way to organize the posts.
To access the Category section, follows the mentioned steps −
Step (1) − Click on Posts → Categories option in WordPress.

WordPress add category

Step (2) − The Categories page is displayed as shown in the following screenshot.

WordPress add category

Following are the details of the fields on Categories.
  • Name − Enter the unique name of categories.
  • Slug − A word chosen to describe your post. It is specified in the tags URL.
  • Parent − By selecting the parent category from dropdown, you can set the particular category as sub-category or can keep it as None.
  • Description − Add brief description of your category. It is optional.
Step (3) − After filling all the information about Categories, click on Add New Category button.
Step (4) − After clicking on Add New Category, the new created category will get displayed on the right side of the page as shown in the following screen.

WordPress add category


wordpress plugin setting

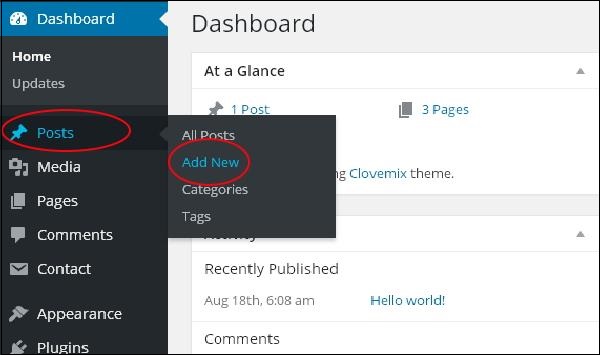
In this chapter, we will study how to use plugins in your WordPress site. Plugin allows to easily modify, customize or enhance WordPress blog or post. The WordPress Plugin is a software that can be uploaded to expand the functionality of the site. They add services or features to WordPress blog. Plugins are used to make your work easier. Following are the simple steps to add plugins.
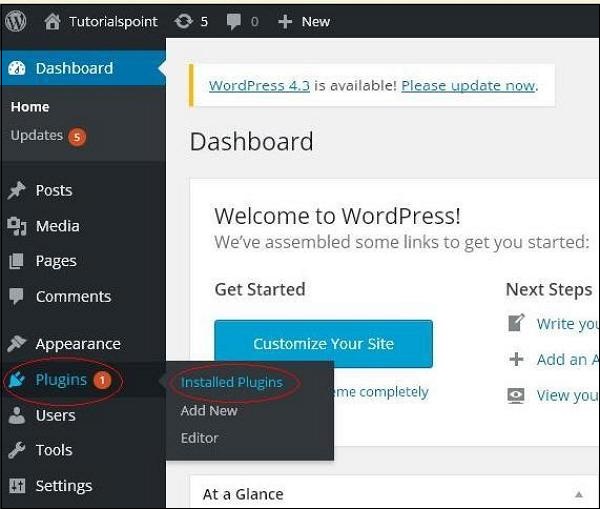
Step (1) − On the left side bar, Click on Plugins → Installed Plugins as shown in the screen.

Wordpress Plugin Settings

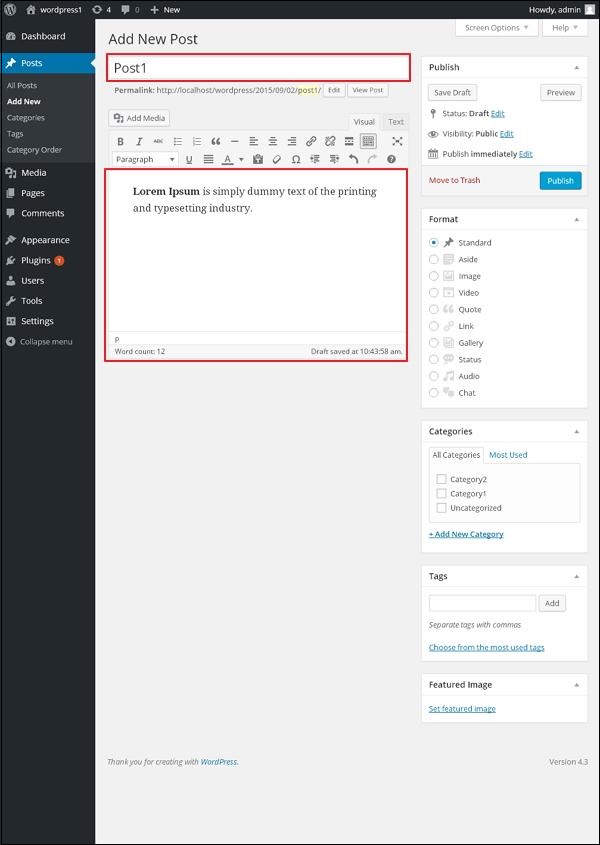
Step (2) − The following page appears.

Wordpress Plugin Settings

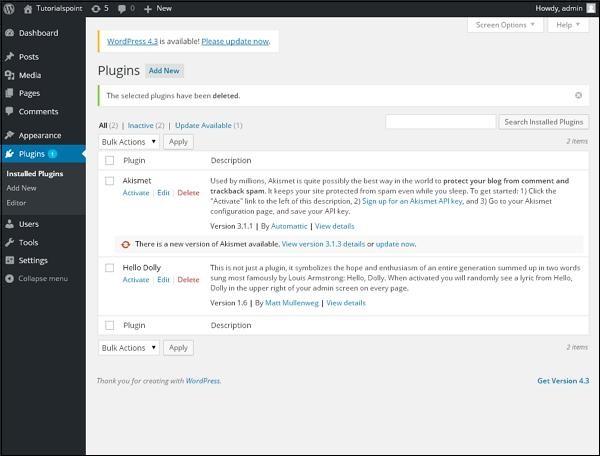
In this section, you can view the already installed plugins.
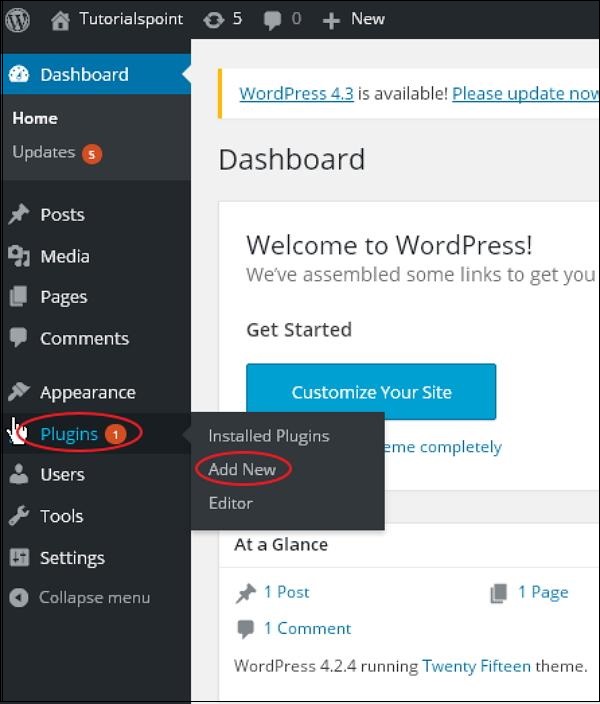
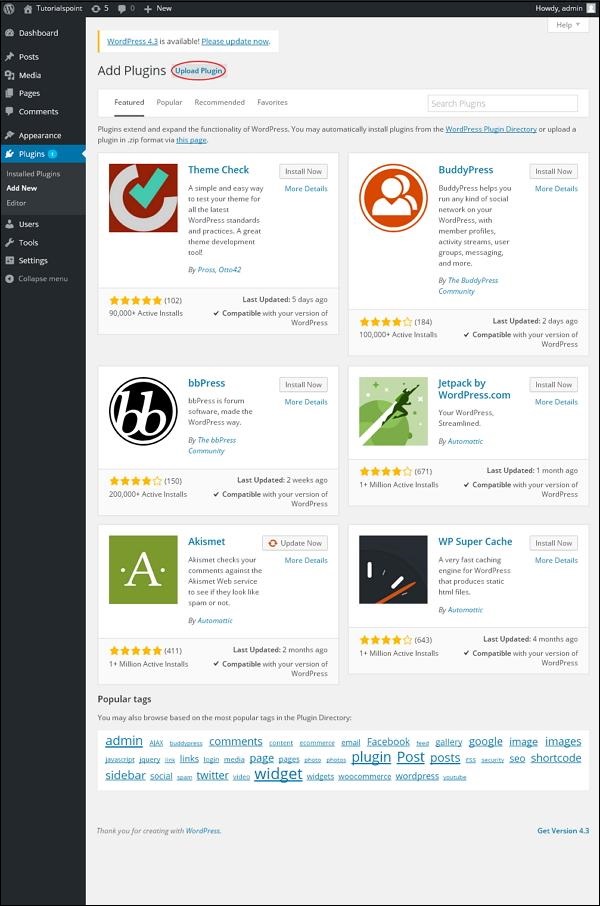
Step (3) − Click on → Plugins → Add New menu as shown in the following screen.

Wordpress Plugin Settings

Step (4) − A list of plugins appears that are used in WordPress. Here you can directly install plugins from the available list or you can upload it by clicking on Upload Plugin.

Wordpress Plugin Settings

When you click on Upload Plugin you’ll get the following page.

Wordpress Plugin Settings

Click on Browse, it goes back to the page where you can select plugins from WordPress site. And if you click on Choose File, you can add files from your system. Otherwise, you can directly choose the plugin that you need and click on Install now as seen in the following screenshot.

Wordpress Plugin Settings

When you click on Install Now, the package starts to download and gets installed. Then, click on Activate plugin to active that plugin to use in WordPress as seen in the following screen.

Wordpress Plugin Settings

After clicking on Activate Plugin you’ll get a message as Plugin activated and you can also find the installed plugin in the list.

Wordpress Plugin Settings

Below the plugin activated message, you can view few options such as All, Active, Inactive and Update available.
When you click on Active the following page appears. Here you can view all the activated plugins.

Wordpress Plugin Settings

When we click on Inactive, the plugins which are available but are not activated gets displayed. You can activate this plugin by clicking on Activate.

Wordpress Plugin Settings

When you click on Update available, you’ll get a list of plugins that must be updated. Click on Update and you get a message as Updated.

Wordpress Plugin Settings

Click on Bulk Actions and select any of the options. Click on Apply button to update, delete, activate or deactivate each of the plugins by checking the boxes.

Wordpress Plugin Settings

In Search Installed Plugins you can just type your plugin name in the text box that is already installed and click on the Search Installed Plugins button.

Wordpress Plugin Settings

When you click on the Search installed Plugin button you get the following page with your respective plugin.

Wordpress Plugin Settings

Step (5) − Click on Plugins → Editor from the side bar.

Wordpress Plugin Settings

Step (6) − The following page gets displayed.

Wordpress Plugin Settings

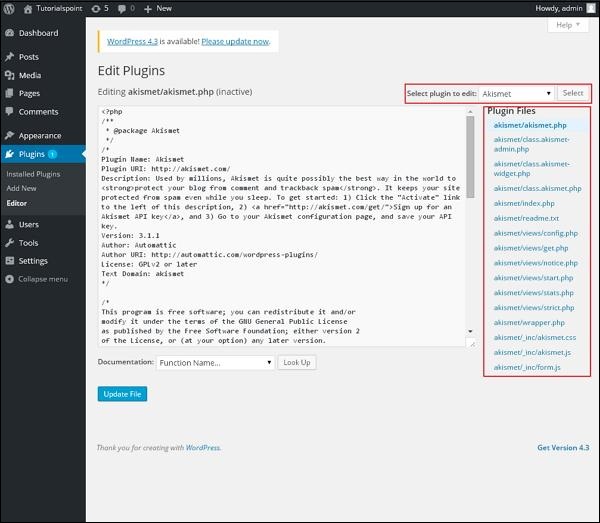
This page lets you edit your plugins. A few options are explained.
  • Select plugin to edit − Allows you to select a plugin from the dropdown and edit it.
  • Documentation − Allows you to select the tools from the dropdown to edit the plugin.
  • Plugin files − Allows you to select files from the list and edit accordingly.
Finally, after editing the plugin files, click on Update file.